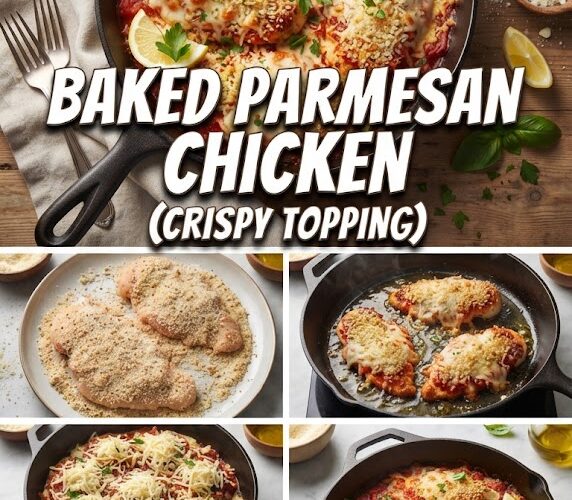
There is a universal culinary truth that resonates in kitchens across America: everyone loves a perfectly cooked piece of chicken. But not just any chicken. We are talking about that specific, mouth-watering intersection of succulent, juicy meat and a golden-brown, shatteringly crisp crust. While traditional frying often yields this result, it brings with it the mess of oil splatters and the heavy caloric load of deep-frying.
Enter Baked Parmesan Chicken with a Crispy Topping. This dish is the holy grail of home cooking. It is elegant enough for a Saturday night dinner party but simple enough to throw together on a Tuesday after a long day at the office. In this comprehensive guide, we will deconstruct the science behind the perfect crunch, explore the nuances of ingredient selection, and provide you with a foolproof method that ensures your chicken never comes out soggy or dry again.
Why Baked Parmesan Chicken is a Culinary Staple
The popularity of Baked Parmesan Chicken in the United States isn’t accidental. It bridges the gap between classic Italian-American comfort food and modern health-conscious cooking. By utilizing the oven instead of a deep fryer, you significantly reduce the saturated fat content while maintaining the textural contrast that makes fried food so addictive.
Furthermore, the flavor profile is incredibly balanced. The saltiness of the Parmesan cheese, the earthiness of dried herbs like oregano and basil, and the sharp kick of garlic create a symphony of flavors that appeal to both children and adults. It is a high-protein, relatively low-carb meal that serves as a canvas for a variety of side dishes.
The Science of the Crunch: How to Avoid the Soggy Bottom
One of the biggest complaints home cooks have when baking breaded chicken is the “soggy bottom.” This happens when moisture from the chicken leaches out during the cooking process and is trapped between the meat and the baking sheet, steaming the breading instead of crisping it.
1. The Wire Rack Method
The absolute best way to ensure 360-degree crispiness is to bake the chicken on a wire cooling rack set inside a rimmed baking sheet. This allows hot air to circulate underneath the chicken, effectively “frying” the bottom at the same time as the top.
2. High-Heat Roasting
Baking at a lower temperature (like 350°F) takes too long, allowing the juices to escape and the breading to become mushy. For the ultimate crispy topping, you want a high-heat environment—typically between 400°F and 425°F. This flash-sears the exterior while keeping the interior moist.
3. Panko vs. Traditional Breadcrumbs
While traditional Italian breadcrumbs have their place, Panko (Japanese-style breadcrumbs) are the secret to a superior crunch. Panko flakes are larger, airier, and drier than standard breadcrumbs. They don’t absorb as much moisture, which means they stay crispy even when exposed to the chicken’s natural juices.
The Anatomy of Ingredients: Choosing the Best Quality
Your dish will only ever be as good as the ingredients you put into it. Since this recipe has relatively few components, quality matters immensely.
The Chicken
Look for organic or air-chilled chicken breasts. Air-chilled chicken hasn’t been soaked in a chlorine-water bath, meaning it has less excess water weight and a more concentrated flavor.
- Pro Tip: Always pound your chicken breasts to an even thickness (about 1/2 inch). This ensures that the entire piece of meat cooks at the same rate, preventing the thin “tail” from drying out while the thick center remains raw.
The Cheese
Do not reach for the green canister of pre-grated “parmesan” found in the pasta aisle. That product often contains cellulose (wood pulp) to prevent clumping, which inhibits melting and creates a grainy texture. Instead, buy a wedge of Parmigiano-Reggiano or high-quality domestic Parmesan and grate it yourself using a microplane or the fine side of a box grater. Freshly grated cheese contains natural oils that help the breading brown and crisp up beautifully.
The “Glue”
To get the breading to stick, you need a binder. While a traditional egg wash (eggs beaten with a splash of water or milk) is standard, many professional chefs prefer a thin coating of Mayonnaise or Greek Yogurt.
- Why Mayo? Mayonnaise is essentially an emulsion of oil and egg yolks. The oil helps “fry” the breading from the inside out, while the proteins in the egg help it stick. It also keeps the chicken incredibly moist.
Step-by-Step Instructions for the Perfect Baked Parmesan Chicken
Equipment Needed
- Rimmed baking sheet
- Wire cooling rack
- Three shallow bowls (for the breading station)
- Meat mallet or rolling pin
- Instant-read meat thermometer
Ingredients
- 4 boneless, skinless chicken breasts (approx. 6-8 oz each)
- 1 cup Panko breadcrumbs
- 1/2 cup freshly grated Parmesan cheese
- 1 tsp garlic powder
- 1 tsp onion powder
- 1 tsp dried Italian seasoning (oregano, basil, thyme)
- 1/2 tsp smoked paprika (for color and depth)
- 1/2 cup high-quality mayonnaise OR 2 large eggs
- Salt and freshly cracked black pepper to taste
- Fresh parsley and lemon wedges for garnish
Phase 1: Preparation
- Preheat and Prep: Preheat your oven to 425°F (220°C). Place the wire rack inside the baking sheet and lightly spray the rack with non-stick cooking spray.
- Level the Chicken: Place chicken breasts between two sheets of plastic wrap. Using a meat mallet, gently pound them until they are an even 1/2-inch thickness.
- Seasoning: Pat the chicken dry with paper towels (moisture is the enemy of crispiness). Season both sides generously with salt and pepper.
Phase 2: The Breading Station
- Bowl 1 (The Binder): If using mayonnaise, place it in the bowl. If using eggs, whisk them thoroughly until no streaks of white remain.
- Bowl 2 (The Crunch): Mix the Panko breadcrumbs, grated Parmesan, garlic powder, onion powder, Italian seasoning, and smoked paprika. Stir until the cheese is evenly distributed through the crumbs.
Phase 3: The Coating Process
- Coat: Take a piece of chicken and coat it thoroughly in the mayonnaise or egg wash. Shake off any excess; you want a thin, even layer.
- Dredge: Press the chicken firmly into the Panko-Parmesan mixture. Ensure you cover the sides and edges. Press down with your palms to make sure the breading adheres well.
- Arrange: Place the breaded chicken on the prepared wire rack, ensuring the pieces are not touching. This allows for maximum airflow.
Phase 4: The Bake
- Cooking Time: Slide the tray into the center rack of the oven. Bake for 15–20 minutes.
- Check for Doneness: The crust should be a deep golden brown. Using an instant-read thermometer, check the internal temperature. It should read exactly 165°F (74°C).
- Resting: This is the most underrated step. Let the chicken rest on the rack for 5 minutes before serving. This allows the juices to redistribute through the meat, ensuring every bite is moist.
Flavor Variations to Elevate the Dish
Once you have mastered the base recipe, you can experiment with different flavor profiles to keep your dinner rotation exciting.
1. The Spicy Kick (Nashville Style Influence)
Add 1/2 teaspoon of cayenne pepper and 1 teaspoon of red chili flakes to the breading mix. After baking, drizzle the chicken with a mixture of honey and hot sauce (Hot Honey) for a sweet-and-spicy finish.
2. Mediterranean Herb
Instead of dried Italian seasoning, use fresh chopped rosemary, thyme, and lemon zest in the breading. Serve with a side of tzatziki sauce or a squeeze of fresh lemon to brighten the fats in the cheese.
3. The Pesto Twist
Instead of mayonnaise or egg, use a thin layer of basil pesto as your “glue.” The oil and pine nuts in the pesto add incredible depth of flavor and a vibrant green hue to the final product.
4. Low-Carb / Keto Version
For those following a ketogenic diet, replace the Panko breadcrumbs with crushed pork rinds or almond flour. When combined with the Parmesan cheese, these substitutes create a remarkably similar crunch without the carbohydrates.
Common Mistakes and How to Fix Them
“My breading fell off!”
This usually happens because the chicken was too wet before coating. Always pat the meat dry with paper towels. Additionally, make sure you press the breading firmly into the meat. If you find the breading is still sliding off, let the breaded (but raw) chicken sit in the fridge for 15 minutes before baking; this helps the “glue” set.
“The chicken is dry.”
Overcooking is the number one cause of dry chicken. Most people cook chicken breasts far longer than necessary. Invest in a $15 digital meat thermometer. Pull the chicken out at 162°F, as “carryover cooking” will bring it up to the safe 165°F while it rests.
“The breading isn’t browning.”
If your chicken is cooked through but the top is still pale, turn on the broiler for the last 1–2 minutes of cooking. Watch it like a hawk, as Parmesan and Panko can go from golden to burnt in seconds.
Perfect Side Dish Pairings
To make this a complete, Google-rank-worthy meal, you need the right accompaniments. Baked Parmesan Chicken is incredibly versatile, but here are some of the best pairings:
The Classic Italian Pairing
- Pasta with Marinara: A simple spaghetti or penne tossed in a bright, acidic tomato sauce cuts through the richness of the cheese.
- Garlic Butter Broccoli: Steamed broccoli florets tossed in melted butter, minced garlic, and a splash of lemon juice.
The “Light & Fresh” Pairing
- Arugula Salad: Peppery arugula tossed with shaved fennel, toasted pine nuts, and a lemon-olive oil vinaigrette. The bitterness of the greens balances the salty chicken.
- Zucchini Noodles (Zoodles): For a low-carb option, sauté zucchini ribbons with garlic and cherry tomatoes.
The Comfort Food Pairing
- Mashed Cauliflower or Potatoes: Creamy textures provide a wonderful contrast to the crunchy chicken topping.
- Roasted Root Vegetables: Carrots, parsnips, and sweet potatoes roasted with honey and thyme.
Storing and Reheating: Maintaining the Crunch
If you have leftovers, the goal is to prevent them from becoming rubbery.
- Storage: Store in an airtight container in the refrigerator for up to 3 days.
- Reheating (The Microwave is the Enemy): Never reheat breaded chicken in the microwave unless you want a soggy mess. Instead, use an Air Fryer at 350°F for 3–4 minutes or a Toaster Oven at 375°F until heated through. This will revive the oils in the breading and bring back that signature crunch.
Nutritional Benefits of Baked vs. Fried
Choosing to bake your Parmesan chicken isn’t just about avoiding a mess; it’s a significant health upgrade.
- Calorie Reduction: A standard deep-fried chicken breast can contain upwards of 500-700 calories depending on the batter. A baked version typically clocks in between 300-400 calories.
- Healthy Fats: If you use an avocado oil-based mayonnaise or Greek yogurt as your binder, you are introducing heart-healthy fats or probiotics into your meal.
- Protein Powerhouse: Chicken breast is one of the densest sources of lean protein, essential for muscle repair and satiety.
The Role of Parmesan in Culinary History
Parmesan, or Parmigiano-Reggiano, is often called the “King of Cheeses.” Originating in the Middle Ages in the provinces of Parma and Reggio Emilia in Italy, it has been a staple of Mediterranean diets for centuries. Its high glutamate content—the source of “umami”—makes it a natural flavor enhancer. When you bake it into a crust, you aren’t just adding cheese; you are adding a savory depth that triggers the reward centers of the brain. This is why Baked Parmesan Chicken feels like such a “complete” meal even with minimal seasoning.
Meal Prep Tips for Busy Families
If you want to enjoy this meal during a hectic work week, you can do most of the prep in advance.
- The Breading Mix: You can mix the Panko, Parmesan, and spices in large batches and store them in a cool, dry place in a mason jar.
- Pound in Advance: You can pound the chicken breasts, season them, and store them in the fridge 24 hours in advance.
- Freeze for Later: You can actually bread the chicken and freeze it raw. Place the breaded cutlets on a baking sheet to flash-freeze for an hour, then transfer them to a freezer bag. You can bake them directly from frozen—just add about 10–12 minutes to the total baking time.
Conclusion: Mastering the Art of the Bake
Baked Parmesan Chicken with a crispy topping is more than just a recipe; it’s a technique. Once you understand the importance of even thickness, the superiority of Panko, and the magic of the wire rack, you have the keys to a restaurant-quality meal in your own home.
This dish celebrates simplicity. It doesn’t require expensive gadgets or exotic ingredients. It requires attention to detail—the grating of the cheese, the patting dry of the meat, and the patience to let it rest. Whether you are cooking for a picky toddler, a fitness-focused partner, or a group of hungry friends, this chicken is guaranteed to be the star of the table.
By following this guide, you aren’t just making dinner; you are mastering a classic. So, preheat your oven, grab your Panko, and get ready for the most satisfying crunch of your life.
Frequently Asked Questions (FAQs)
Can I use chicken thighs instead of breasts?
Yes! Chicken thighs are more forgiving because they have a higher fat content and are less likely to dry out. However, they may require an extra 5–10 minutes of baking time. Ensure the internal temperature reaches 175°F for thighs, as the dark meat texture is better at a slightly higher temp than breasts.
Is this recipe gluten-free?
As written, no. However, you can easily make it gluten-free by using Gluten-Free Panko or crushed gluten-free crackers. Ensure your spices are certified gluten-free as well.
What if I don’t have a wire rack?
If you don’t have a rack, you can lightly grease the baking sheet, but be aware the bottom won’t be as crispy. Alternatively, you can create “ridges” out of crumpled aluminum foil to lift the chicken slightly off the pan.
Can I make this in an air fryer?
Absolutely. The air fryer is essentially a high-powered convection oven. Cook at 375°F for 12–15 minutes, flipping halfway through. It produces an incredibly crispy result.
What is the best way to grate the cheese?
For the best texture in the breading, use a Microplane. It creates “snow-like” cheese that integrates perfectly with the Panko flakes, ensuring every square inch of the chicken has cheese flavor.